Create and publish your wedding website
Your project comes with a wedding website. Fill it in, choose its address and publish or hide it.
Every project includes a wedding website with your details and the RSVP form. It is created the first time you open it — already published, with sample texts for you to replace.
Step by step
Step 1Open the website builder
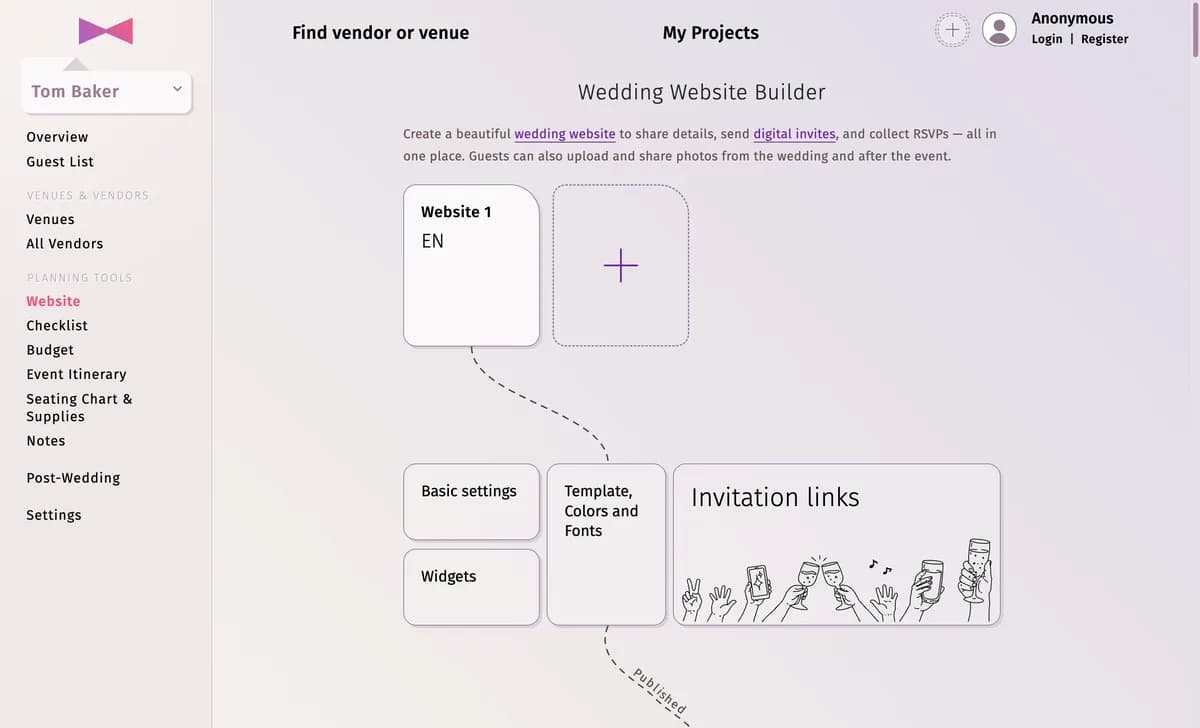
Click Website in the menu. The page Wedding Website Builder shows your website (“Website 1”) and its settings: Basic settings, Widgets, Template, Colors and Fonts and Invitation links.
Step 2Replace the sample content
Below the tiles is the website itself. In Edit mode click any text to change it, upload a cover photo and images, and open a block’s Configuration for its settings. Preview shows the page as guests see it.
Step 3Choose the address
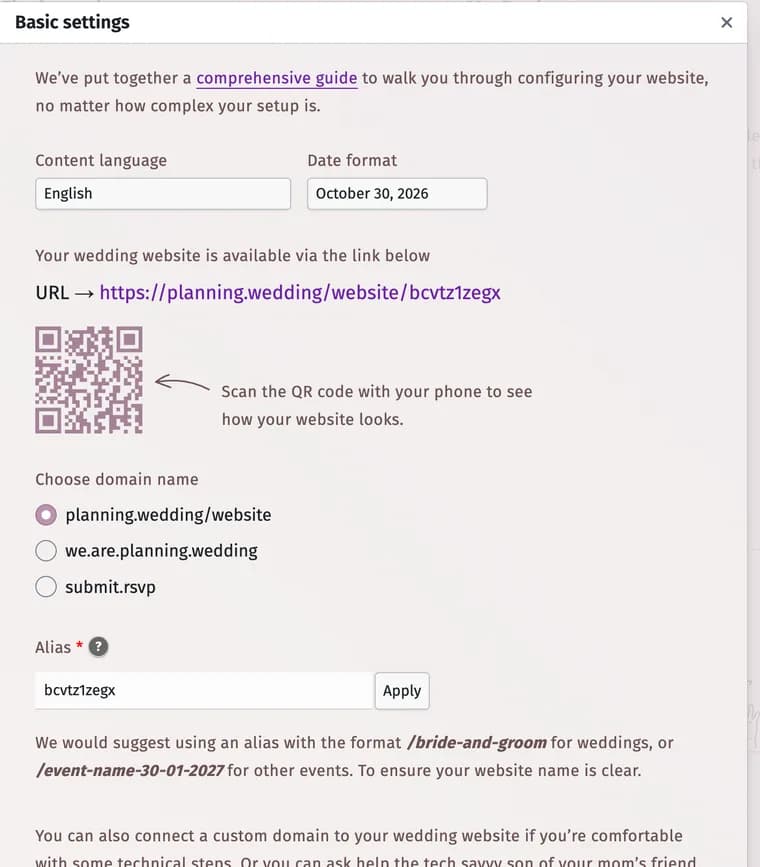
Open Basic settings. Your website’s link is at the top, with a QR code. Under Choose domain name pick one of the addresses, type the last part in Alias — for example your names — and click Apply.
Step 4Set the language and date format
Content language and Date format are also in Basic settings.
Step 5Publish or hide it
The switch The website is published at the bottom of Basic settings takes the website online or offline. Then share the link — or send personal invitation links, see Send personal invitation links.
Tips and important notes
- Title for social media and the preview image in Basic settings set what a messenger shows when you share the link.
- You can connect a domain of your own (Add custom domain), protect the site with a password (Add password protection) and create more websites, for example one per language (Add another website). The custom domain, the password and extra websites need Premium.
- Basic settings also shows how many times the website was visited and how many RSVPs it received.
- Delete this wedding website at the very bottom removes the website.
Updated November 3, 2026