Let guests upload photos on your website
Set up the photo upload section, choose who sees what, and print a QR card for the tables.
Your website has an Upload Photos section where guests add their photos from the day. The photos also land in your Post-Wedding album.
Step by step
Step 1Open the section’s settings
Open Widgets and click the gear next to Upload Photos (add it with Add widget if it isn’t there).
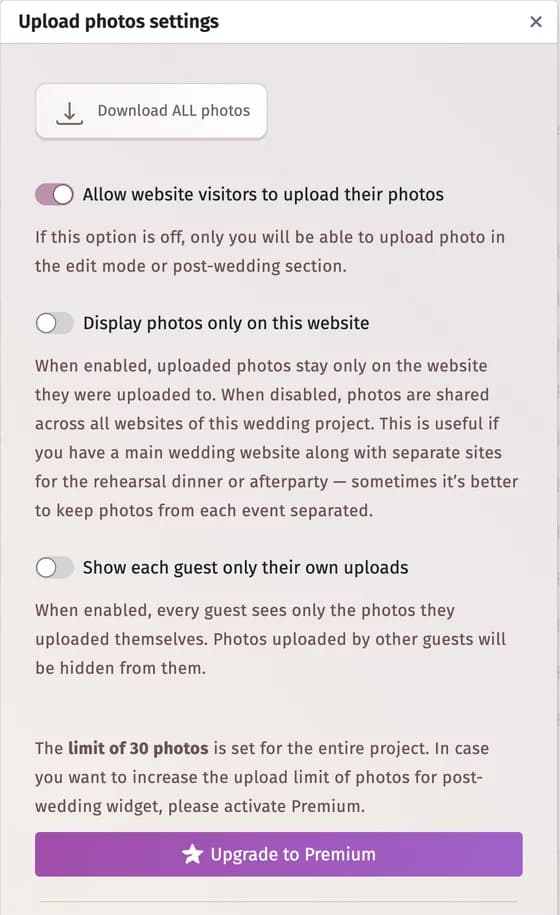
Step 2Choose the rules
- Allow website visitors to upload their photos — when off, only you can upload.
- Display photos only on this website — keeps the photos of each website apart, for example the wedding’s and the after-party’s.
- Show each guest only their own uploads — each guest sees only their own photos. Show your own uploads to all visitors then decides whether your photos stay visible to everyone.
Step 3Put a QR card on the tables
The QR-Code Share Photos section has a printable card — Print it out and place it on the table — with a QR code that opens the upload section (its link ends with #upload). It works only while the Upload Photos section is on the website.
Step 4Download the photos
Download ALL photos in the section’s settings downloads everything — see Download all photos.
Tips and important notes
- A project holds 30 photos in total on the free plan and 1,000 with Premium.
- Where the photos end up: Let guests upload their photos.
Updated November 3, 2026