Place cards
Make a name card for every guest, with the table and the meal icon, from your guest list and seating chart.
Classic Name Cards makes a card for every guest on your list who has a name. The table comes from the seating chart, and the meal icon from the guest’s main course.
Step by step
Step 1Open the place cards
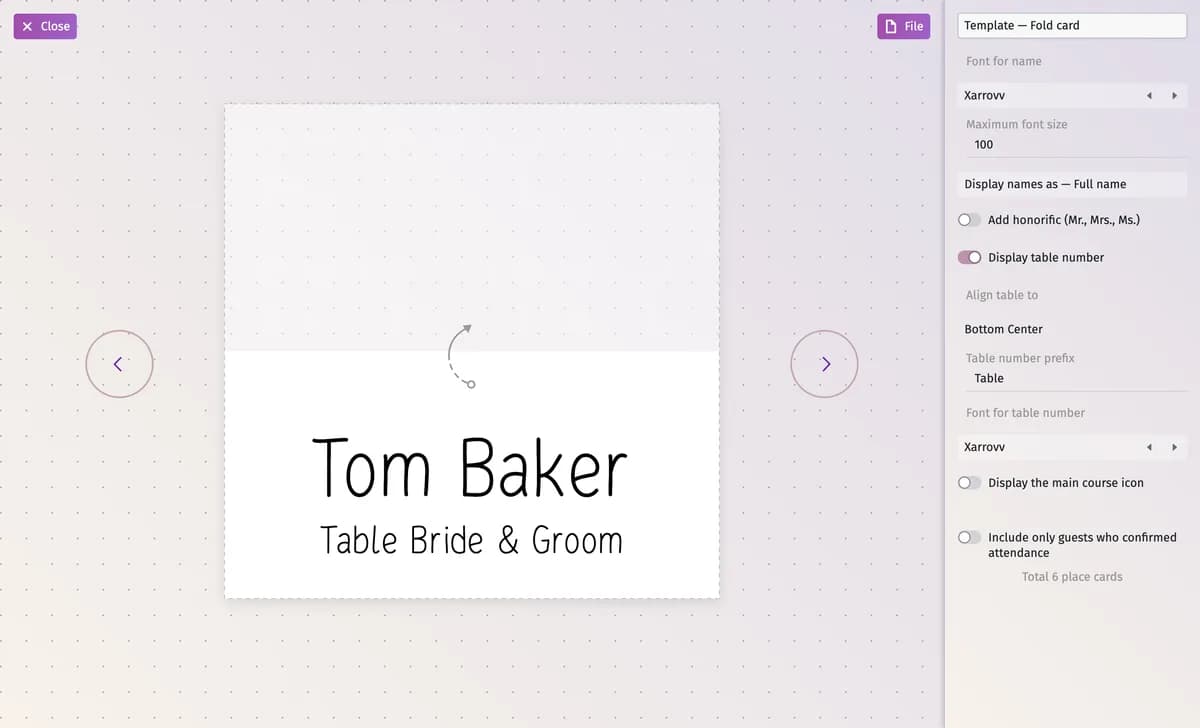
In Seating Chart & Supplies choose Classic Name Cards under the reception chart and click Click here to edit layout. The editor shows one card; the arrows page through your guests.
Step 2Choose the card
At the top of the panel choose Fold card — a card folded in half that stands on the table — or Simple card, a flat one.
Step 3Set how names look
- Font for name — the font of the name; the arrows next to it try the next one.
- Maximum font size — the largest size a name may have.
- Display names as — the full name, only the first name, or the first name and the first letter of the surname.
- Add honorific (Mr., Mrs., Ms.) — adds Mr., Mrs. or Ms. before the name.
Step 4Show the table and the meal
Display table number adds the guest’s table; Align table to puts it at the top or the bottom, with its own Table number prefix (for example “Table”) and Font for table number. Display the main course icon adds the icon of the guest’s main course.
Step 5Choose who gets a card
Turn on Include only guests who confirmed attendance to leave out guests who haven’t confirmed. The number of cards is shown under the settings.
Step 6Download
Open File and click Download PDF file. Downloading needs Premium.
Tips and important notes
- A guest without a name — for example a role you added but haven’t named yet — gets no card. Add the name in the guest list.
- The table on the card is the table’s name in the seating chart, such as “1” or “Bride & Groom”. Rename the table in the chart editor and the cards change too.
- See Stationery from your seating chart for adding, renaming and deleting stationery, and Seat your guests for the seating itself.
Updated November 3, 2026